Control a Ragdoll Together Eight Worlds Walkthrough
From the Plains to the Ember Core—what to expect and how to use checkpoints.
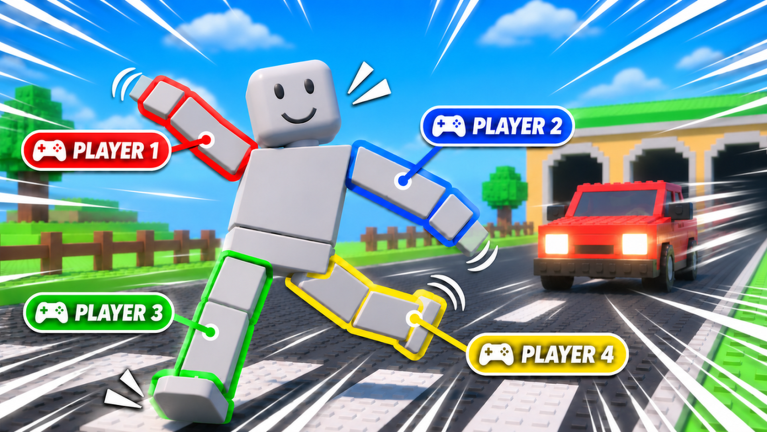
Control a Ragdoll Together! structures its campaign as eight worlds that escalate from open tutorial space to a finale nicknamed the Ember Core. You will not find a traditional XP tree here; progress is measured in coordinated clears, checkpoint discipline, and whether your stack still laughs after the twentieth wipe. This walkthrough explains the arc, what each difficulty band feels like, and how to spend checkpoints wisely. For trap-by-trap inputs, keep the obstacle guide open beside this page.
New to the puppet? Skim Getting Started first so limb select and blame UI are not mysteries.
Campaign fantasy at a glance
- Start: Plains — wide platforms, gentle jumps, first social lessons
- Middle: mixed biomes introducing monkey bars, rock walls, spikes, and hammers in rotating combinations
- End: Ember Core — heat, meteors, stacked timings, little room for freestyle
Exact in-client subtitles can shift with patches from Ragdoll Obby Games, but the published fantasy remains Plains → Ember Core across eight stages. Track wording changes on the updates hub.
World bands and what to expect
Worlds 1–2 — Plains foundation
Expect generous landings and obvious safe floors. Your real test is social: can four people stop mashing? Use these rooms to run the freeze drill from controls and to establish a caller per co-op tips. Do not speed-run past the first checkpoints; they are practice gyms.
Checkpoint tip: After every new flag, force a five-second hold. Early habits prevent Ember Core disasters.
Worlds 3–4 — Bars and walls arrive
Monkey bars and rock walls start gating progress. Seat your steadiest climbers on arms (tier list priority). Legs should brace instead of inventing dance moves. If your duo struggles, this is the band where inviting a third player helps—see players.
Checkpoint tip: If you clear a bar room ugly, still pause. Ugly clears teach bad muscle memory for the next copy-paste layout.
Worlds 5–6 — Spikes and hammers mix
Narrow walks and crushing rhythms overlap. Spikes punish noisy legs; hammers punish early dashers. You will see the blame system more often. Treat each popup as data. Consider swapping seats so calm players own legs through spike halls.
Checkpoint tip: Limit attempts per hammer to three, then take a morale break. Fatigue creates “ghost inputs.”
Worlds 7–8 — Road to Ember Core
Hazards stack. Falling meteors join the cast, bridges break, and safe tiles shrink. Full four-stacks shine if callouts stay strict; uncoordinated fours collapse faster than a focused duo. Solo heroes can still learn layouts, but expect longer reset loops.
Checkpoint tip: Never leave a late checkpoint on tilt. One joke, one water break, one restated plan—“meteors strafe left on go”—then pull.
Checkpoint strategy (universal)
- Touch, call, freeze. Make the flag a ritual so no limb sprints ahead unseen.
- Reseat intentionally. Change roles only on checkpoints, never mid-bar.
- Scout one cycle. Watch hammers or meteor shadows a full loop before the attempt that “counts.”
- Budget attempts. Decide “three tries then swap caller” to avoid ego loops.
- Backtrack mentally, not physically. Talk through the last fail using blame data instead of instantly retrying blind.
Checkpoints are the campaign’s kindness. Ignoring them is how stacks burn ninety minutes on one room.
Recommended progression paths
Learning path (solo or duo): Clear Plains twice for muscle memory → introduce bars in worlds 3–4 → stop for obstacle drills → resume.
Friends night path (3–4): Warm up in Plains ten minutes → push until the first nasty hammer → optional break → Ember Core push only if morale is high.
Practice path: Park at a mid-world checkpoint and repeat one hazard type using the obstacle guide until the blame UI goes quiet.
Party notes per band
| Band | Ideal size | Focus |
|---|---|---|
| Plains | 1–2 | Input discipline |
| Bars/Walls | 2–3 | Arm specialists |
| Spikes/Hammers | 2–4 | Caller authority |
| Ember Core | 2 or 4 (disciplined) | Short callouts, meteor plan |
Random public strangers can work in Plains and fail spectacularly later. Private friend servers—or at least a pre-made party—raise clear rates.
Story and tone without spoilers
The game sells physical comedy more than cutscene lore. Enjoy the escalating environments: grass and open air give way to harsher materials and hotter lighting as you near Ember Core. Let the art direction telegraph danger; when the palette warms and meteor shadows appear, tighten your rules of engagement.
After you clear Ember Core
Celebrate, then help a newer friend through Plains without smurfing callouts too fast. Revisit the About & Links hub if you want creator group follows, and ignore fake reward pressure on codes unless a real promo appears. True mastery is repeating late worlds with cleaner blame stats—not hunting executors on the scripts page.
Play the arc in order once. After that, treat mid-world checkpoints as ranked practice maps. The eight-world climb is short enough for an evening and deep enough for a week of “one more try.”
Frequently Asked Questions
Quick answers to the most common questions.
How many worlds are in Control a Ragdoll Together?
Eight worlds, escalating from the Plains to the Ember Core.
Do I need to clear worlds in order?
Play the arc in order first so tutorials and difficulty gates make sense. Later you can use checkpoints as practice arenas for specific hazards.
When should we reseat limbs?
Only at checkpoints. Mid-obstacle swaps cause desync and fresh fails.
Which worlds introduce meteors?
Meteor pressure ramps toward the late campaign and Ember Core. Scout a full fall cycle before committing from the nearest checkpoint.
Is Ember Core soloable?
Solo is allowed, but stacked hazards punish divided attention. Most players prefer at least a duo for the finale.